Growing Tomatoes is one of the first things I help new gardeners learn to do. They are easy to grow and they’re the number one vegetable in home gardens in America. This guide will teach you everything you need to know from starting tomato seeds, planting seedlings, dealing with pests and diseases, and more from planting all the way through to harvest.

Growing Tomatoes
There are two types of tomatoes, determinate or indeterminate. Determinate plants are those which bear fruit that ripens all at once or close to it. Indeterminate plants are those that continue to grow and produce fruit throughout the entire growing season.
We talk more about determinate and indeterminate tomatoes later on.
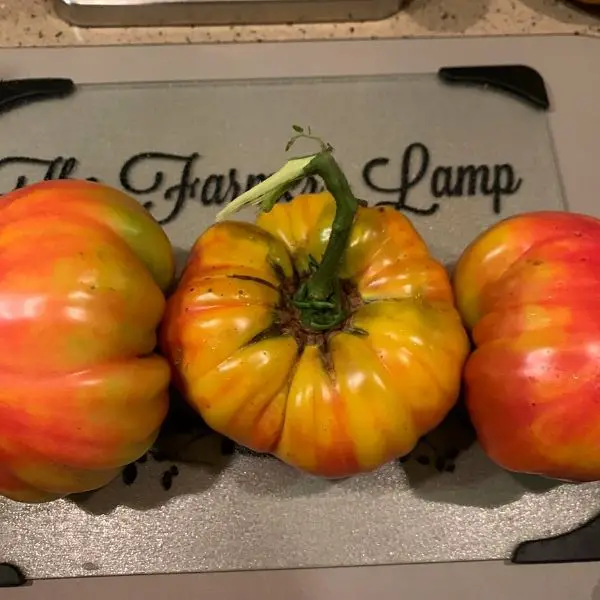
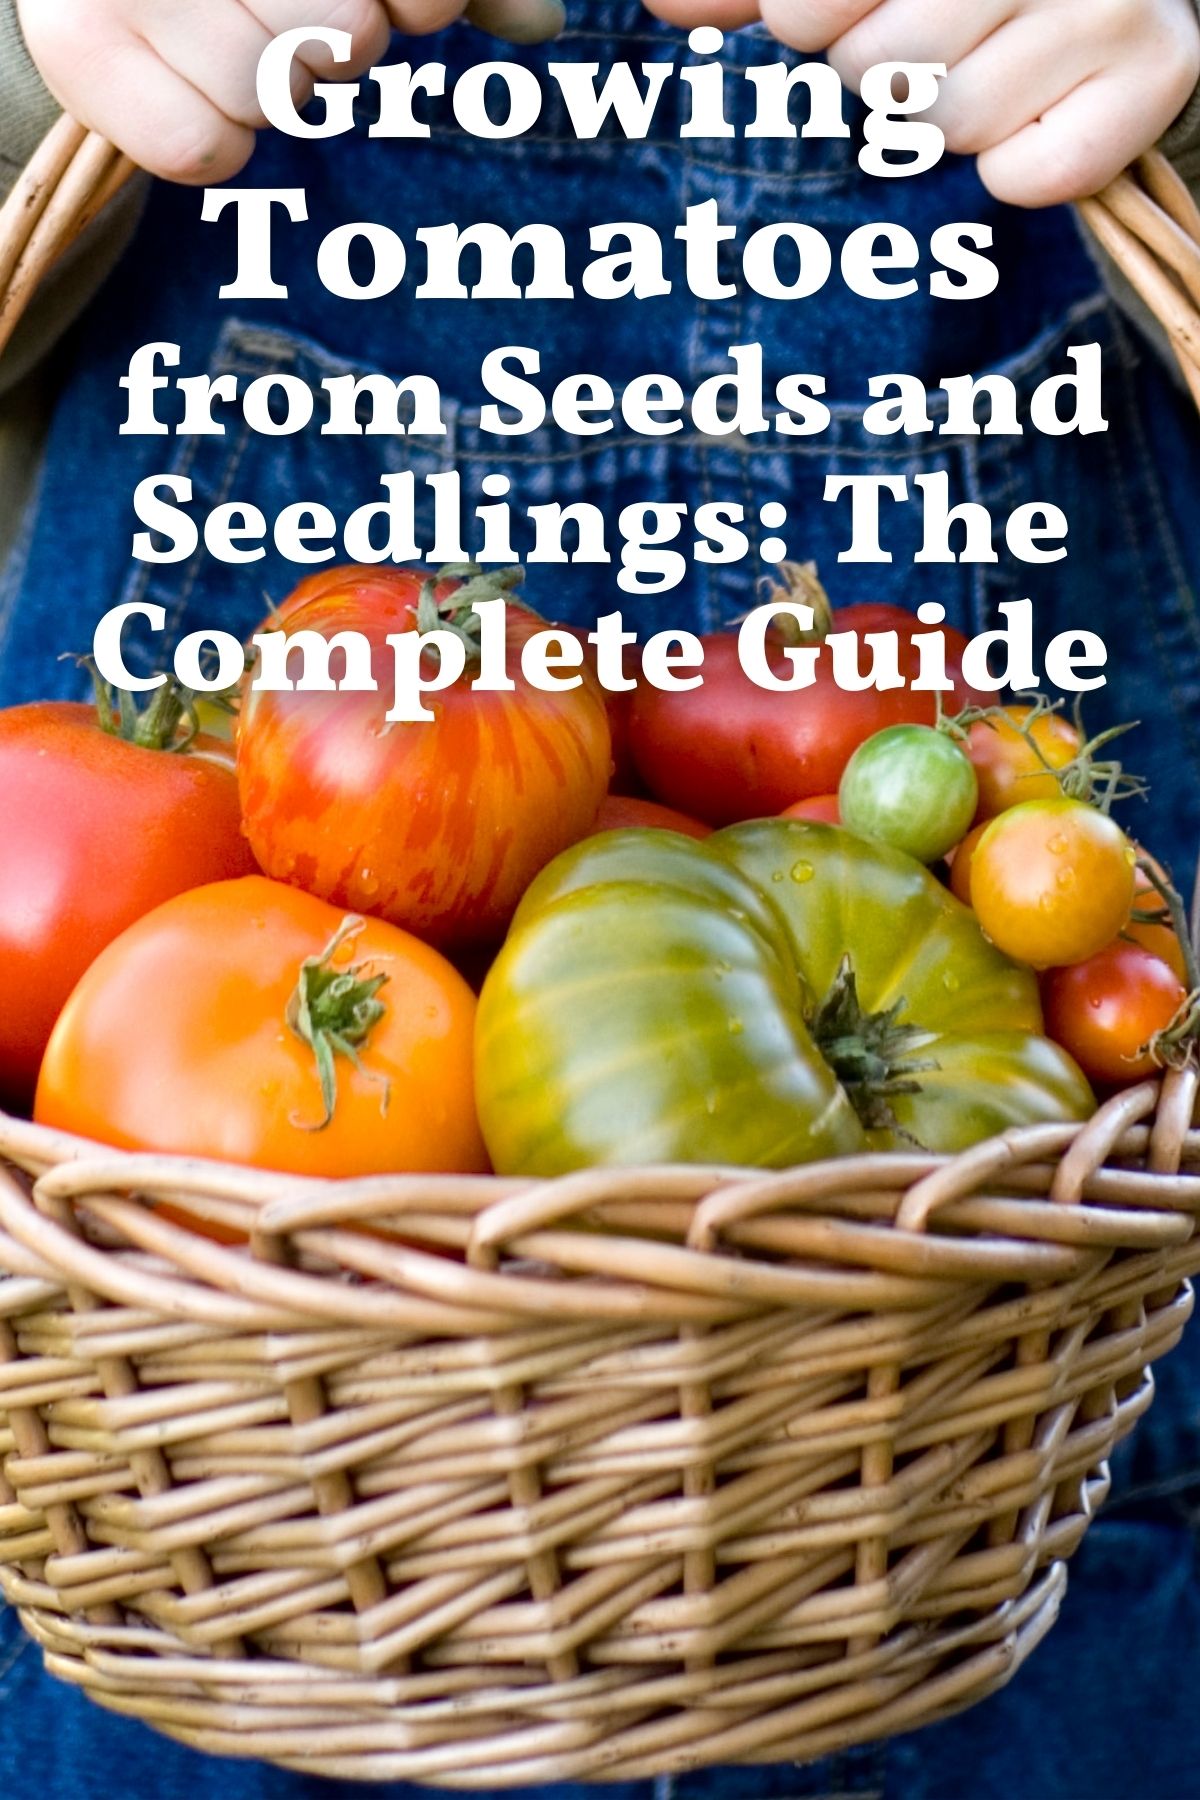
There are hundreds of varieties of tomatoes from the large “beefsteak to the tiny pear paw. The range of colors is from deep purple to crimson, bright yellow, green, reds of all shades, and even striped!
We only grow heirloom tomatoes so we can save their seeds. A hybrid will not be able to reproduce itself. and it’s illegal to save seeds from any GMO plant.
About Tomatoes
Tomato plants are warm-weather crops and can not tolerate frost. Knowing the first and last frost dates for your area is important. Remember the dates are estimates so keep your eye on the local weather.
It’s critical not to plant tomatoes in the ground too soon. In most areas, outside tomato planting isn’t possible until late spring and early summer, when the soil is sufficiently warm.
From starting the seed to harvest is from 60 to 100 days depending on the variety of tomato you planted.
Most gardeners prefer transplanting seedlings instead of direct sowing. If you live in a climate with a long growing season either way is an option for you.
I can and have grown tomatoes with direct sowing, however, I prefer transplanting seedlings for two reasons.
- We prefer this method because when we transplant a seedling, we can add super soil, eggshells, and worm castings to the hole or around the hole. This is a special shot of vital nutrients for the root system and production.
- We like to plant 3-4 inches of the stalk of the seedling in the ground. We have found this strengthens the plant when it is loaded with tomatoes.

How to Choose Good Starter Plants
- We grow our own from seeds but if you purchase yours, it’s important to choose from a reputable nursery.
- Starter plants should be short and stocky with dark green stalks and leaves. They should have straight stems about the size of a pencil or thicker.
- The leaves of the plants should not be yellowing, spotted, or have stress damage. The plants should also not be flowering or bearing fruit.
- You should not be able to see roots around the top of the container. This indicates the plant is root-bound and may not survive.
Determinate vs Indeterminate
Determinate tomatoes – AKA Bush varieties of tomatoes.
- These grow 2 to 3 feet tall
- Develop and mature numerous tomatoes at the same time
- Do not have multiple harvests
- Have relatively no leaf grown once they have set their fruit
- Typically more productive than the vining types, and they don’t begin to produce until well into the growing season.
- Do not require staking or cages
- Ideal for containers and small growing spaces
- Paste tomatoes are usually determinate which makes preparation of sauce and canning easier because they are all ripe about the same time.
Indeterminate tomatoes – AKA as “vining” varieties of tomatoes – although they aren’t truly vining.
- Produce the largest types of tomatoes. They will produce from mid-season until the first frost.
- Fruit is developed and matured all season long
- Continue to grow leaves due to length of growing season
- Require staking or caging
- Ideal for large gardens or raised beds because of the space required
- The majority of tomato varieties are indeterminate.
Days to Maturity and Harvest
- Early Varieties produce a harvest in 70-75 days
- The Solar Flare Tomato is a stunning early variety with luscious color and flavor
- Mid-Season Varieties produce a harvest in 75-85 days
- The Orange Accordion Tomato is one of the most unusual mid-season tomato varieties we’ve ever grown. It has sweet, meaty flesh.
- Late-season Varieties produce a harvest in 80-95 days
- The Yellow Brandy Tomato is known for good yields and fruity taste.
- Cherry Tomatoes are a wide range of tiny bite-size tomatoes. They come in many colors, flavor ranges, and uses.
- Our personal favorite is the Yellow Pear Tomato. We shared some with an elderly lady in our area this year and she told me it was the best tomato she had ever put in her mouth.
- Every year we try something new in the garden. This year we’re trying the Litchi Tomato. I am intrigued by what is described as a creamy, mild cherry flavor.
Tomato Disease Resistance Codes
You will see these in seed catalogs and on the plant information of transplants from a nursery. It can be helpful if you know our soil or area is prone to any of these.
- V Verticillium Wilt
- F Fusarium Wilt
- FF Fusarium, races 1 and 2
- FFF Fusarium, races 1, 2, and 3
- N Nematodes
- A Alternaria
- T Tobacco Mosaic Virus
- St Stemphylium (Gray Leaf Spot)
- TSWV Tomato Spotted Wilt Virus

Soil Requirement
Tomatoes are not picky about their soil. There are a few things to keep in mind for the best harvest and help your tomatoes be happy, healthy plants.
- They do best in well-drained, loamy, loose, and sandy soils with a pH of 6-7.
- They may be grown in almost every soil type except for very heavy clay.
- Like most garden vegetables, they won’t survive in dry soil but you should avoid planting them in any area that gets waterlogged or has standing water after a rain.
- For more on improving your soil or soil pH, we have information to help you.
Sun Requirements
Tomatoes are dependent on the sun as are all plants, but tomatoes must have enough sun to develop and ripen fruit or it will cast them off.
In northern regions or cooler climates, they require at least 6 hours of sunlight each day; 8 to 10 hours is better.
In southern regions, like where I am, we must provide shade during the afternoon when the temperatures are scorching hot. I accomplish this by planting them where taller plants that love the sun all day long, like okra, will shade them in the late afternoon.
Select a site that receives a lot of sun and where tomatoes or other members of the nightshade family, like eggplants, peppers, and potatoes, have not been grown in the past three years. Crop rotation is critical to successful gardening.
Water Requirements
- Always water your garden in the early morning. This gives the plants sufficient water for hot days but it is also part of protecting them from damage. If you water them after the sun is high, you risk scorching them which may kill them. If you water in the evening, there is no time for the water to evaporate from the leaves which makes them susceptible to diseases that may kill them.
- Water 2-3 times a week for the first few weeks after planting tomato seedlings or transplants to help them avoid shock and establish root systems.
- After 3 weeks, they will need about 2 inches (about 1.2 gallons) per week throughout the growing season.
- Water your plants at the base of the plant, not from above. This will help to avoid water droplets landing on the leaves and risk causing disease.
- Mulch your tomatoes after transplanting to retain moisture, prevent water from splashing the lower leaves, and control weeds. Organic mulches such as straw, leaves, or wood chips should be applied at a thickness of 4 to 6 inches.
Should You Fertilize Tomatoes
You should have already performed any soil amending before the planting season started. Knowing the pH of your soil is essential too.
We work compost into our soil, worm castings, and any other additions we feel necessary. Of course, by using the super soil recipe, we don’t have to amend the soil as often.
If your tomatoes show signs of stress, it may be necessary to offer them fertilizer to boost their growth and production.
- Pull back the mulch layer before applying fertilizer.
- Do not fertilize around the stalk, but instead, apply it to the soil at the drip line of the plant.
- Only use organic fertilizers.
- Replace mulch after you fertilize
Tomatoes like
- liquid seaweed or organic fish emulsion
- Epsom salt for magnesium
- Do not use fertilizers with high nitrogen content. This will create a lot of lush green foliage, but very little fruit.
- If you have depleted soil, apply fertilizer every 3 weeks during the growing season.

Growing Tomatoes From Seed
- Tomato plants should be started indoors from 4-6 weeks before the last spring frost and transplanted outdoors when soils have warmed to above 70 degrees F.
- Plant 2 to 3 seeds in each pod in case some do not germinate.
- Plant tomato seeds ¼ inch deep in seed starting pellets, cups, or trays and soak them with water.
- Keep the seeds moist but not saturated while germinating.
- Seeds will germinate in 7-14 days.
- When they have two to three true tomato leaves, they are ready to be hardened off in preparation for transplanting.
- When you transplant them to the garden, keep the strongest seedling in each pod and either separate and plant the others or discard them in the compost pile. I often am able to separate them and have extra plants.
- You can also sow tomato seeds directly in the garden as soon as the soil has warmed to 55 degrees F but this is a minimum temperature. Seeds may take longer to germinate at this chilly temperature. For faster germination, they need soil at least 70 degrees F.
- Plant seeds 1/2-inch deep and the correct distance apart according to your variety requirements.
- It’s a good idea to plant 2 to 3 seeds in every hill (spot you plant a seed) in case one doesn’t germinate. You will thin them later if each seed sprouts.
- If you need to thin seedlings, keep the strongest plant and pull the other one(s) leaving only one tomato plant per hill.
- Check the maturity dates to be sure you have enough days in the growing season to allow plants to mature the tomatoes with direct sowing.
Harden Off Plants Before Transplanting
If you start your seeds indoors, they must be hardened off before transplanting to the garden or container.
Hardening off is a term used for the acclimation of plants from indoor conditions to outdoor conditions.
- To harden off seedlings, start at least one week before transplanting.
- Set them outdoors in the shade for a few hours on the first day.
- Gradually increase this time each day to include some direct sunlight.
- Once they are able to take full sunlight, they’re ready for transplanting.
- Return them to their indoor spot at night until they are fully acclimated.
- Depending on your growing zone, this process can take one to three weeks.
Transplanting Seedlings
Once all danger of frost has passed, your seedlings have two to three true leaves and they are hardened off, it’s time to place them where you want them to grow.
- Your soil needs to be at least 60 degrees F.
- Dig a hole twice the diameter of the root ball of the plant. If you grew them in cups or pods, the hole should be twice their diameter.
- We dig our hole deep enough so the bottom leaves are just above the surface of the soil. Because roots will grow all along the stem underground this creates strong stalks and root systems.
- The minimum depth for planting a seedling is 3″ deep.
- The space required between plants depends on the variety and kind you are planting. A good rule of thumb is 2 to 3 feet apart for plants and 3-4 feet apart for rows if grown in traditional row gardens.
- Replace the soil in the hole and pack well to remove air pockets.
- Water thoroughly to help avoid transplant shock.
Options When Transplanting
- Some people like to put their tomato stakes or cages in when they plant. We like cages best but have cut green limbs from trees and stuck them in the ground to use as stakes.
- If you stake your tomato plants, gently tie the main stalk to the stake with garden twine or string, rags, nylon stockings, or such so as not to cut into the stem.
- If your soil is not in need of amending, you can add calcium, phosphorus, and a tiny amount of nitrogen to the hole before you refill it and water. A good organic tomato fertilizer is an easy way to add what they may need.
- Some people pinch off the baby leaves, which are the lowest leaves, before transplanting. I do not do this but it’s ok if you do just be careful not to break the tender stalk or remove the true leaves.
- If you will be saving your own seeds from this year’s harvest, plant your varieties at least 12 feet apart. 30-50 feet apart is ideal if you have the space.
- We add a can of sardines (in water) and one-half cup of coffee grounds to the hole we are going to place a transplant, cover it with 1/2″ of soil and then put the transplant in the hole.
- As the tomato grows, its roots will begin to absorb the nutrients from the soil and from the decaying sardines and coffee grounds.

How To Grow Tomatoes in Containers
Not all varieties are suitable for growing tomatoes in containers. Check the description of the plant and the minimum space requirements.
- Use a large pot or container with good drainage from the bottom. The diameter depends on your plant choice but should be at least 20 inches in. and 12 inches deep.
- Potting soil should be loose and well-draining, at least 12 inches of a good organic potting mix and peat or coconut coir. I prefer coconut coir.
- Choose dwarf or bush types; many cherry tomatoes do well in containers. Staking may be required for taller varieties.
- Plant one tomato plant in each pot and be place it where it will receive at least 6 hours of sunshine throughout the day.
- Keep the soil moist but not saturated. Check the soil by inserting your finger 1-2″ into the soil. If your finger is dry, water the plant.
- Containers will dry out faster than garden soil in raised beds or traditional row gardens. This means you must check them every morning and water them as necessary especially in the hot part of the growing season.

Tips for the growing season
- Avoid letting the limbs touch the ground. This makes the plants susceptible to disease.
- Keep the moisture level as even as possible. Inconsistent watering can result in split tomatoes and blossom end rot.
- Now, there are two views on removing suckers (new, tiny stems and leaves between branches and the main stem). Some people remove them and some do not.
- We experimented one year and could not tell a real difference in production when we left them alone. We will continue to pinch off suckers because we did feel the pants we removed them from were healthier and the fruit larger.
- Removing the suckers aids air circulation and allows more sunlight into the middle of the plant.
- Another thing we do that not everyone does is top off the plant once it reaches the top of the stalk or cage. In our experience, this keeps the plant focused on the production of fruit and not on large green foliage.
- Trim the bottom 8-10″ inches of the stalk’s lower stems and leaves as a plant develops. This accomplishes two things: it ensures no stems are in contact with the ground and it causes the plant to grow up and out for maximum production.
Harvesting Tomatoes
- Leave tomatoes on the vine until they have ripened to the color they’re supposed to be. Red, orange, purple, whatever the kind you’ve planted.
- They may not be the size you want or expected but if they are the right color and easily indent when lightly pressed, they are ready for harvest.
- If the temperature outside starts to drop and your tomatoes are not ripening, try using one of these methods:
- Pull up the entire plant, brush off the dirt, remove any foliage not attached to the fruit, and hang the plant upside down in a cool place out of direct sunlight.
- Mature, green tomatoes that have lightened (developed the whitish hue just before they begin to develop their color) can be placed stem up, in a loosely sealed paper bag in a cardboard box or a cool dark area.
- Place the box or store them in the paper bag at 55 to 70 degrees F.
- Ripening is accelerated by cool temperatures; it is slowed by warm temperatures.
- Remove soft, spotted, ill, or ripe fruit on a regular basis.
- Tomatoes do not ripen well in direct sunlight. They may get rotten before they are ripe!
General Tomato Issues
- If flowers do not form, it may be because the plant is not getting enough sun or water. If this is the case, you will need to provide more sun or water to make sure the plant can flower.
- If plants produce flowers but no fruit, they could be experiencing too little light, not enough water, inconsistent watering, or the temperatures may be too cold (below 70 degrees at night). Your garden may not have enough pollinating insects. Most tomatoes are self-pollinating but their production will be higher with pollinators present.
- If flowers form but fall off, this is usually due to high daytime temperatures or a mineral deficiency in the soil. If it is very hot outside, provide shade during the hottest part of the day by using row covers or shade cloth. Perform a soil test to see what they need or offer an organic fertilizer specifically for tomatoes.
Tomato Pests
Like most garden plants, tomatoes are susceptible to pests. We use a special Neem Oil spray we mix ourselves to successfully treat and prevent most insect problems in the garden.
We also use diatomaceous earth to help with this problem but use it sparingly because it can also damage beneficial insects.
Our neem oil spray recipe for garden insects
Makes ½ Gallon of the spray
- Spray bottle (1/2 Gallon or smaller)
- 1 Tbs pure, cold-pressed, raw neem oil
- 1 tsp pure baking soda
- 1 tsp castile soap or mild dishwashing soap
- Water to fill the bottle
- Add all these to your spray bottle then add enough water to finish filling the bottle.
- Shake well and spray.
- Shake well before each use.
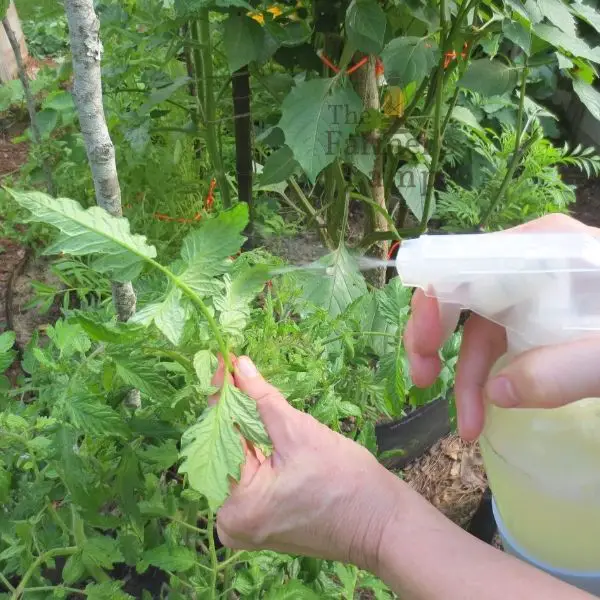
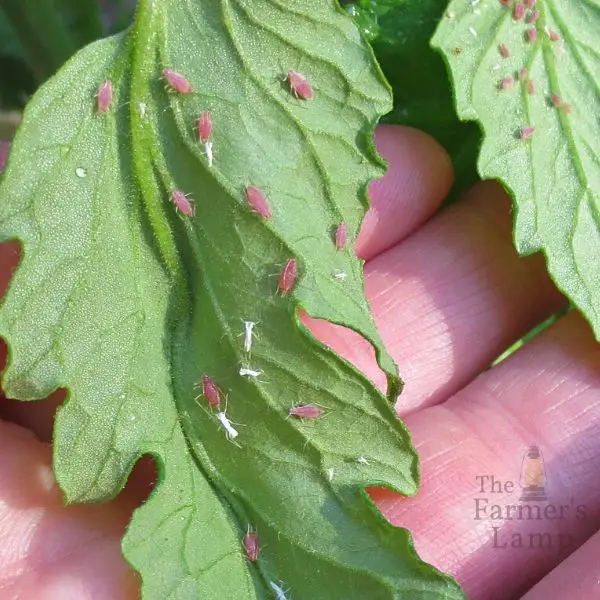
What are those red bugs and white bugs on my tomatoes?
They are probably spider mites and aphids. There are a few they could be but these are the typical culprits. Here are some photos of spider mites and aphids for you to compare yours to.

Tips for Pest Control
- Check your garden every day for pests and diseases, particularly under leaves, inside the fruit, and near the soil.
- Spray any insects, like aphids stinkbugs, mites, or worms, with our neem oil spray or the spray you choose for your garden. Be sure to spary the front and back of affected leaves.
- Handpick tomato hornworms from plants. You will know they are there because you will see sections of leaves and stems eaten off or you’ll see their poop piles on the leaves. Use gloves, I don’t always, remove them and kill them with your fingers, feet, or by dropping them into a bucket of soapy water.



Common Tomato Diseases
- Blossom-End Rot causes the bottom of the tomato where the flower was to develop dark spots and rot. This is usually due to a calcium imbalance. You can add calcium to your soil easily. An old-timer told my husband to flick off the bloom once the tomato develops because it holds moisture and causes rot. We tried this has seemed to help.
- Early Blight is a fungal disease that causes leaves to fall off. Blight risk increases in July due to the high humidity and warm days and nights. It begins with dark brown to black concentric rings around 1/2 inch in diameter. If you catch the infection early and get rid of the leaves that are infected, your plant may survive. To help protect outdoor tomatoes from this infection, make sure they have good ventilation and strip off the lower leaves as the fruits develop. This will also help the ripening tomatoes get maximum exposure to sunlight.
- Late Blight is a fungal disease that causes leaves and fruit to develop grey moldy spots and then brown. The disease spreads in persistent damp weather. There is no real solution for late blight. I remove any affected leaves and burn them and if a plant has a lot of this on it, I pull it up and burn it in an attempt to prevent it from spreading to other plants.
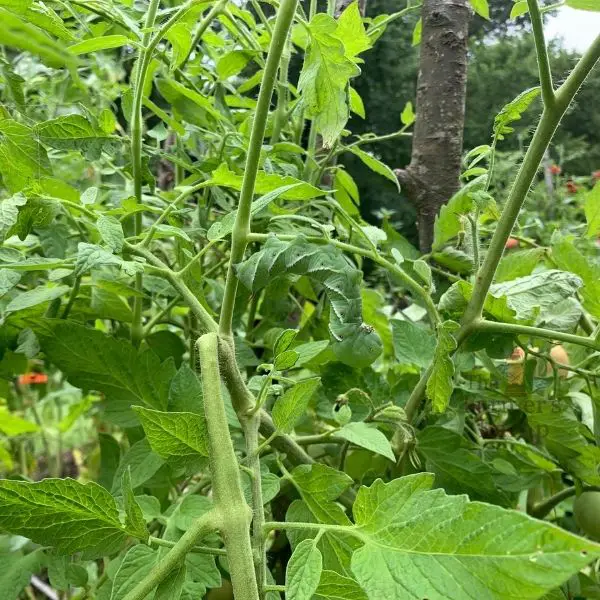
- Mosaic Virus causes leaves and stems to be narrow and twisted. Usually, the leaves develop yellow mottled areas. If you see this on one of your plants, remove it immediately and burn it. Do not put it in your compost pile.
- Fusarium Wilt starts with yellowing of the leave on one side of the plant and they begin to wilt. It usually moves from bottom to top on the plant as it spreads. There is nothing to be done for this but to remove the plant and burn it away from other plants.
- Powdery Mildew is a fungal disease that leaves white spots or what looks like a white powder on the leaves. It is manageable with the neem oil spray or a spry of baking soda and water applied early in the morning and allowed to dry before the sun hits the plant.
An Ounce of Prevention
As with most everything in life, prevention is the key to success when it comes to problems.
- You can protect your garden from diseases by using disease-resistant varieties. The codes for these varieties are listed on the packets of seeds or seedlings (for example, F = Fusarium Wilt).
- Crop rotation is critical. Keep in mind that members of the same family should not be planted in the same area more than two years in a row. If you plant tomatoes in a certain area one year and another member of the nightshade family, like eggplant, in that same spot the following year, you must not plant another family member in that same spot for two years. This prevents diseases and insects that love certain plants from laying in wait to destroy your harvest.
- Make sure the soil is well-draining. Always use compost or organic matter.
- Water consistently and evenly. Never leave water standing in the garden or around plants.
- Destroy any plants that are infected. If you don’t, the disease will spread and it will be harder to get rid of later. Do not compost any plants that are infected.
- Solarize the soil. If the issue is severe, cover your soil with plastic for 6 to 8 weeks during the hottest part of the summer; bacteria will be destroyed by the sun.
Storing and Preserving Tomatoes
- Don’t refrigerate fresh garden tomatoes because it ruins the flavor and texture.
- To freeze tomatoes, core them and place them whole in freezer bags or containers. Be sure to seal the bag or container well, label each bag, and freeze. The skins will easily slip off when they thaw.
- Can tomatoes using either a pressure canner or water bath canner. This is our favorite way to preserve the tomato harvest. In fact, besides pressure canning meat, tomatoes are the only thing we still preserve with canning. You can freeze tomatoes until you have enough to fill your pressure canner then simply thaw them and process as usual.
- Dehydration of tomatoes is becoming pretty popular. I’ve not tried it although we preserve everything but tomatoes with our dehydrator. It takes less storage space and the flavor of everything is fresh-picked when you cook it.

How to Save Tomato Seeds
Tomatoes are a great crop to start with if you want to save seeds. They are one of the easiest to save and you can get all you need from one or two tomatoes. When a tomato is ripe, its seeds are too.
If you plan to save seeds from this year’s harvest, you should plant your varieties at least 12 feet apart. However, if you have a lot of space, it’s better to plant them 30-50 feet apart. If you have a small garden, you will need to choose just a few varieties and space them 12 feet
- I select the healthiest tomato and save seeds from it.
- To save tomato seeds, squeeze the pulp and seeds into an uncovered glass jar. You can slice the tomato first if it’s a large one.
- Allow them to sit at least one day in a warm (80-90°F) location away from direct sunlight for the pulp to ferment. This allows the tomato seeds to be separated from the coating that covers them.
- The viable seeds will sink to the bottom of this mixture, and the dead seeds will float.
- When you see mold beginning to form on top of the liquid, pour or scoop off the floating solids and dead seeds.
- Use a fine-mesh strainer to drain the remaining liquid from the viable seeds and thoroughly rinse them.
- Once you have rinsed them and allowed the water to drain well, spread them on a drying screen, or a shallow bowl or saucer and place them in a warm area out of direct sunlight to dry completely.
- Allow them 5 to 7 days to be completely dry then store them in a seed envelope or glass jar in a cool dry place.
- Tomato seeds will remain viable for 5-10 years.
Interesting Tomato Facts
- The tomato is a strange fruit because it is from America but people in America didn’t know about it as a food until Spanish explorers brought the seed to Europe and then it came back to America.
- Tomatoes were once thought to be poisonous.
- Some plants in the Nightshade family are poisonous. This is probably why some people think that tomatoes are poisonous too.
- Back in 1781, there was a record of Thomas Jefferson growing tomatoes for his guests.
- People have argued about whether tomatoes are fruits or vegetables for a long time.
Summary
Tomatoes are a popular garden vegetable that can be grown from seeds or seedlings. They are easy to grow and produce abundant harvests.
There are many different types of tomatoes, and they can be grown in many different climates. Tomatoes need full sun, regular watering, and fertile soil to grow well.
They can be preserved by freezing, pressure canning, dehydration.
It’s incredibly easy to save their seeds to produce next year’s crop. When properly saved, tomato seeds will remain viable for up to ten years.
You can read more about tomatoes on TFL.
We hope you are inspired and feel confident to begin growing tomatoes or to improve the way you have been doing it.
As always, we’re here to help.

Leave a Reply