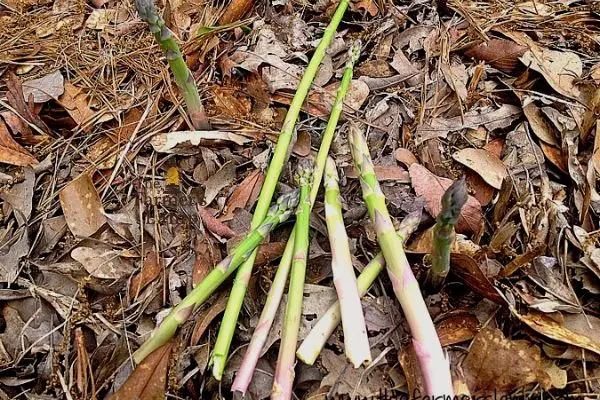
If you’re eager to learn how to grow sweet potato slips, you’ve come to the right place. Sweet potatoes not only add a splash of color to your garden with their vibrant vines and blooms, but they also yield a bountiful harvest of one of the most nutritious plants you can grow. With over 50 years of gardening experience, I’ll guide you through the straightforward yet fascinating process of starting your sweet potato slips in water and then planting them for a successful harvest. Let’s embark on this gardening adventure together and discover how simple and enjoyable growing sweet potato slips can be!

Learning How to Grow Sweet Potato Slips
One thing about me is unmistakable – my love for sweet potatoes runs deep. Our garden yields on average an impressive 450 pounds from just six 25-foot rows. We share and heartily enjoy these earthy treasures throughout the winter with our family and friends.
A little fun fact: my sweet potatoes even had their moment of fame! When my eldest son was residing in his grandmother’s old house in Mississippi, it was selected as a backdrop for the film ‘Life At These Speeds.’ The crew was so enamored by a basket of sweet potatoes I had given him, they ended up featuring them in the kitchen scenes of this poignant story about loss, forgiveness, and hope.
Sweet potatoes aren’t just a crop for me; they’re a source of immense joy. From the thrill of starting slips to the pleasure of watching their vines and purple flowers flourish, each step is a fulfilling experience. Harvest time feels like a treasure hunt, unearthing these vibrant, earthy jewels. And the culinary possibilities? Endless. Not only are sweet potatoes nutritional powerhouses and excellent keepers, but their leaves are also edible, offering a variety of flavors and nutrition.

Sweet Potato Slips: Timing and Adaptation Tips
Having spent most of my gardening life in Zone 8, I’ve tailored my sweet potato growing schedule to its specific climate. Typically, this would mean starting slips from mid-January to early February, aiming for planting in late March or early April. However, in the past two years, my gardening conditions have changed, and I’m currently adapting to a different environment.
As I prepare to return to Zone 8 this year, I’m reminded of the importance of flexibility in gardening. Regardless of your zone, start sweet potato slips four to six weeks before your last expected frost date.
Sweet potatoes, unlike other potato varieties, don’t produce seeds and are instead propagated through a process unique to root plants like them called vegetative propagation. While white potatoes sprout from their ‘eyes,’ sweet potatoes, being true roots, don’t have eyes. Instead, they reproduce by making rooted sprouts or slips.
In my experience, I’ve discovered that medium-sized sweet potatoes are optimal for slip production, yielding between 20 to 50 slips each. This might seem counterintuitive, but my experiments have confirmed it. I once tried using a couple of large potatoes alongside the medium ones I usually use. To my surprise, both the large and very small potatoes produced fewer slips compared to the medium-sized ones.

Easy Steps to Propagate Sweet Potato Slips at Home
Learning how to grow sweet potato slips is a fulfilling part of gardening. There are various methods gardeners use, each with its own merits. Some prefer bedding their sweet potatoes in soil, burying them halfway in a foot of good soil. Others cut their sweet potatoes in half, placing each half in water with the cut side down, so they’re partially submerged. My preferred method, however, involves water but with a whole potato.
As fall approaches, I select some of the healthiest medium-sized sweet potatoes from the harvest to use for slips. Timing is key, so start this process four to six weeks before your last frost date. I usually lean towards the six-week mark to give myself ample time for the slips to grow robustly.
- Gather Your Materials: Start by grabbing quart jars. Choose regular or wide-mouth jars, depending on the size of your sweet potatoes.
- I always use wide-mouth jars.
- Prep the Potato: Take toothpicks or shish kebab sticks and pierce the potato around its midpoint.
- Ensure the sticks stick out enough to perch the potato securely on the jar’s rim.
- Set Up the Potato: Next, place your sweet potato in the jar. It should be half-submerged in water, with the sticks resting on the rim, like a little boat.
- Choose the Perfect Spot: The location of your jar is key. Make sure the sweet potatoes bask in indirect sunlight and stay clear of any chilly drafts.
- Keep an Eye on the Water: Regularly check the water level, topping it up whenever it dips a couple of inches.
- Water Maintenance: While you don’t want the potato to go thirsty, it’s equally important to switch out the water weekly to prevent rot.
- Between you and me, I sometimes stretch this to two weeks without any problems!
By following these steps, you’ll have learned how to grow sweet potato slips and be able to watch the sweet potato sprout and get ready to be planted.

Preparing and Preserving Sweet Potato Slips for Planting
Once you begin the process of growing slips, the first signs of success are visible in about two weeks when slips start to sprout. The goal is to let these sprouts, or slips, grow until they reach about 6 inches in length, flourishing with several sets of leaves. At this stage, they’re ready to be separated from the mother sweet potato.
While some gardeners prefer to leave the slips attached to the potato until planting time, I take a different approach to maximize yield. By removing the slips early, the potato is encouraged to produce more, rather than just developing the existing ones.

To detach the slips, gently pull them at their base where they connect to the sweet potato. It’s a delicate process, as you want to keep the slip intact. After removal, place the slips in a clean jar filled with cool water. This jar should then be placed in a spot with indirect sunlight, similar to the initial setup. Maintain the water level in the jar and refresh it weekly to prevent rotting.
Within a week to ten days, you’ll notice roots starting to form. This method keeps the slips viable until they are ready for the garden. Typically, I don’t keep my slips in water for more than four weeks, but sometimes inclement weather changes things.
In 2013, due to an unusually wet winter and spring, my garden’s soil was too damp for planting. My slips, ready and waiting in their jars, began to struggle and show signs of stress, like yellowing. To save them, I took a proactive step: banking them in soil. Doing this helps prevent rot and gives the slips a head start in root formation while waiting for the garden conditions to improve.
Sweet potato slips can be “banked” or temporarily held in soil for about 3 to 4 weeks. During this time, it’s important to keep the following in mind:
- Moisture: Ensure the soil remains consistently moist but not waterlogged. This helps the slips to develop a robust root system.
- Use a well-draining soil and pot to prevent a problem.
- Light: Provide them with adequate light, but avoid direct, intense sunlight that could stress them.
- Temperature: Keep them in a warm area, as sweet potatoes prefer warmer temperatures for optimal growth.
It’s important to remember that while banking slips in soil can give you some flexibility in timing, you should transplant them to your garden as soon as the conditions are favorable. This includes ensuring that the soil temperature in your garden is consistently warm (ideally above 60°F or 15°C) and the danger of frost has passed, as sweet potatoes are very sensitive to cold temperatures.
If you notice the slips are growing vigorously and starting to become root-bound or overly large while banked, it’s a good indicator that they should be transplanted to allow for adequate space and resources for continued growth.
Get Your Green Thumb Guides: The Core Five eBook Bundle!


Successful Sweet Potato Slip Transplanting
When the time comes to transition your slips from the jar or banked soil to your garden, timing and technique are key. Ideally, planting should occur at least two weeks after the last frost, when the soil temperature is consistently at or above 70°, or simply when the ground is dry enough to work with.
- Prepare the Garden Spot: Create hills (soil “hilled” into rows) in your garden bed, each about 3 inches high.
- Spacing Plants: Space your plants in the hilled rows approximately 3 feet apart, your rows should also be 3 feet apart, allowing each plant enough room to grow.
- Digging Holes: For each slip, dig a hole about 3 inches deep in the hill, ensuring it’s large enough for the roots.
- Make the hill deeper if the sweet potato slip roots require it.
- Planting Slips: Place each slip in its hole and gently cover it with soil.
- If conditions are dry, water the slip before covering.
- Soil Preference: Sweet potatoes thrive in well-drained, sandy soil.
- Moisture Balance: Keep the soil moist, but avoid overwatering.
A valuable piece of advice I once received is to plant every single slip, even those that might seem past their prime. Sweet potatoes have remarkable resilience. Last year, I planted a row of slips I was almost certain wouldn’t survive, yet they proved me wrong by flourishing and yielding as well as the others. This just goes to show, it’s always worth giving them a chance.
Regular weeding is crucial in the early stages while your vines are still developing. However, once the vines begin to spread, sweet potatoes become natural weed suppressors. Their sprawling growth and root formation help keep weeds at bay, reducing the need for further weeding. It’s important to handle the vines with care; avoid tearing them as this can harm the plant and potentially reduce your yield.
Sweet potatoes are also drought-resistant, which means they typically don’t require frequent watering once their vines are well-established. In fact, drier conditions can often promote more abundant harvests. After about 100 days from planting, you’ll be ready to harvest. You can read about harvesting, storing, and preserving sweet potatoes in our dedicated post.

Frequently Asked Questions About Growing Sweet Potato Slips
- What’s the best way to start growing sweet potato slips?
- Select healthy, medium-sized sweet potatoes and place them in jars filled with water, ensuring they’re half-submerged. Use indirect sunlight for growing.
- How long does it take for sweet potato slips to sprout?
- You’ll generally start seeing sprouts in about two weeks. Aim for slips to grow about 6 inches with several leaves before planting.
- When should I start growing sweet potato slips?
- Begin this process four to six weeks before your last frost date for optimal growth.
- Can I leave the slips attached to the sweet potato until planting?
- While some gardeners prefer this, removing slips early can encourage more slip production from the potato.
- How do I care for sweet potato slips before planting?
- After detaching, place slips in water in a spot with indirect sunlight. Change water weekly to prevent rot.
- What are some tips for transplanting sweet potato slips into the garden?
- Plant slips in well-drained, sandy soil, and maintain moisture without overwatering. Sweet potatoes thrive in warm temperatures and don’t need much water once established.
You May Also Enjoy

Wrap UP
Learning how to grow sweet potato slips involves a blend of careful timing and adaptive techniques. The process begins with selecting the right potatoes, and ensuring they are nurtured under the right conditions of sunlight and water. Planting these slips requires attention to soil preparation and proper spacing, steps crucial for the slips to thrive. Sweet potatoes showcase their ability to flourish in a range of garden environments and bring a rewarding experience to any gardener.
Throughout the growing season, these plants quietly demonstrate resilience and strength. They ask for little but offer much in return – a bounty of sweet potatoes, rich in nutrients and versatility. The entire process, from the early days of sprouting slips to the joy of harvest, is a journey full of learning and discovery. Sweet potatoes are more than just a crop; they’re a symbol of the beauty and abundance that can be found in a well-tended garden.
If you’re inspired to learn how to grow sweet potato slips for your garden, remember, it all begins with a single slip. Whether you’re a seasoned gardener or just starting out, there’s always room to grow, learn, and share. And when you do dig your sweet potatoes, I’d love to hear about your success and see what harvest you received.
As always, we’re here to help.

“Sweet potatoes, on the other hand, develop from the roots of the plant, not along stolons. They don’t need repeated mounding to form tubers—they grow in a cluster around the original planting spot.”
That’s the most interesting thing I learned from your article, Thanks
You’re very welcome and wishing you all the success possible in your gardening this season! – Dee
Hi Rhonda, I have a question about starting sweet potato in water. What end of the sweet potato do you put in the water and what end do the slips come out of? I don’t see that anywhere in any explanation on Pinterest. I hope you can answer my question because I have my sweet potatoes ready to start thank you. I’m from Nova Scotia Canada.
Hi Maggie, great question! For the whole-potato-in-a-jar method, you don’t have to stress too much about “end up/end down” because you’re suspending the sweet potato around its midpoint with toothpicks (or shish-kebab sticks) so it sits half-submerged. That said, if you do want an “up/down” rule of thumb:
– Put the fatter, more rounded end down toward the water.
– Keep the more tapered/pointy end up.
The slips (the green sprouts) usually pop out from the part of the sweet potato that’s above the water line (the “top” portion). Then you’ll usually see roots forming in the water from the submerged portion. You’ll often see sprouts in about two weeks, and you want them around 6 inches with several leaves before you pull them off. A few tips…
– Keep the jar in bright, indirect light (not cold window draft).
– Change the water weekly to prevent rot.
– Start slips 4–6 weeks before your last frost date (in Nova Scotia you’ll likely appreciate every warm week you can get)!
Hi I’m in the uk, I’m growing sweet potatoes from cuttings, they root incredibly easily! Saves trying from an existing potato. However, how do I keep them safe till I can plant them out next spring?
Hi Manda! Thanks for the great question, it inspired a new article for our community and we think it will help others out as well. Here’s more information on growing sweet potatoe slips in cooler climates and how to keep them safe until it’s time to get them in the ground. Wishing you success in the garden!
Hi Rhonda!
This will be my first time growing sweet potatoes, although I have successfully grown red, white, and also purple potatoes in the past. I’ve certainly noticed that they are completely different in terms of starting the plants, but wonder if the growing process itself is also quite different.
Growing non-sweet potatoes starts with planting the sprouted potatoes in relatively shallow soil, and then “hilling“ the dirt up as the plant gets taller. This process gets repeated several times throughout the season, which results in multiple potatoes at different depths. It’s not specifically mentioned here, so is that something that’s not necessary when growing sweet potatoes?
Hi Jan! Love your question :). No, you do not need to hill sweet potatoes like you do with non-sweet potatoes.
My understanding is that regular potatoes form tubers along underground stolons that grow out from the main stem. Hilling them with soil encourages more stolon formation and protects new tubers from sunlight (which turns them green and toxic).
Sweet potatoes, on the other hand, develop from the roots of the plant, not along stolons. They don’t need repeated mounding to form tubers—they grow in a cluster around the original planting spot.
Some folks will “hill” or slightly mound the soil once at planting to improve drainage and encourage root spread, but that’s not the same repeated hilling done with non-sweet potatoes. Once they’re the sweet potatoes are in and growing, they don’t need the soil built up around them again.
Thanks for the great question, happy sweet potato growing!
can i segment a long slip into parts to root. can i root a leaf. can i plant in compost only
Hi Nancy, great questions :). I’ll try to answer them in order. 1. Yes, you can segment a long slip in parts for rooting, each segment must have at least 1 healthy leaf node (where the leaves attach to the stem.) 2. Sort of… just a leaf without the stem/node won’t work but if you take a leaf with a bit of the stem attached including a node you can root it in soil or water. . 3. Yes, you can plant in compost BUT sweet potatoes like loose, well-drained soil that has some structure so compost might be too loose or drain too quickly. It may also lead to long, skinny or twisted tubers since they might grow too fast in the loose material. Compost is also high in nitrogen which may lead to lots of vines and fewer tubers. Maybe go with a 50/50 compost to soil mix instead. If you do try straight compost, let us know how it goes? Happy gardening!
Hi Rhonda!
Thank you so much for your detailed information!
I’m from Sydney , Australia, so the slip have to be planted in summer?
We are now in full hot weather, I just bought 2 sweet potatoes to try, can I start putting pieces in water, to plant in March ?, the end of summer?
Temperatures now is between 22 to 38.
I’m so looking forward to your reply.
I have a tinny garden, only 4 metres by 1, nothing compared to yours, but I love to go every day and pick something and straight to my mouth!
I love my hands in the soil and love to see the growing, it’s an adventure!
Thank you again!
Ana
Hi Ana, I’m so excited to hear you are going to enter the exciting world of growing sweet potatoes! It’s almost as addictive as keeping chickens (LOL). I want to be sure you understand a few things. First, I don’t have experience with the seasons in Australia, so we’ll just talk about specific things Sweet Potatoes need, ok? We plant them in the spring as soon as the soil is 70 degrees, which is late March early April for us. They need 100 days of warm weather before being harvested. I’m not sure, as I said, if planting them at the end of your summer will allow that kind of time. Timing is key, so we start the process of growing slips four to six weeks before our last frost date. You are trying to plant before your frost, if I understand you correctly? I usually lean towards the six-week mark to give myself ample time for a lot of slips. You don’t put “pieces” in the water, you put the whole sweet potato. The post will tell you exactly how to do it. If your weather allows for at least 100 days of warm weather (70-90F) you should be ok. I’m glad to know you are growing what you can where you are. Good job! If you have more questions, or I failed to answer yours thoroughly, just let me know and we’ll work it out together. You can post a reply here or email me directly and I’ll do all I can to help you be successful! Let me know how it goes, I’m always excited to learn from others, especially those in other parts of the world!